

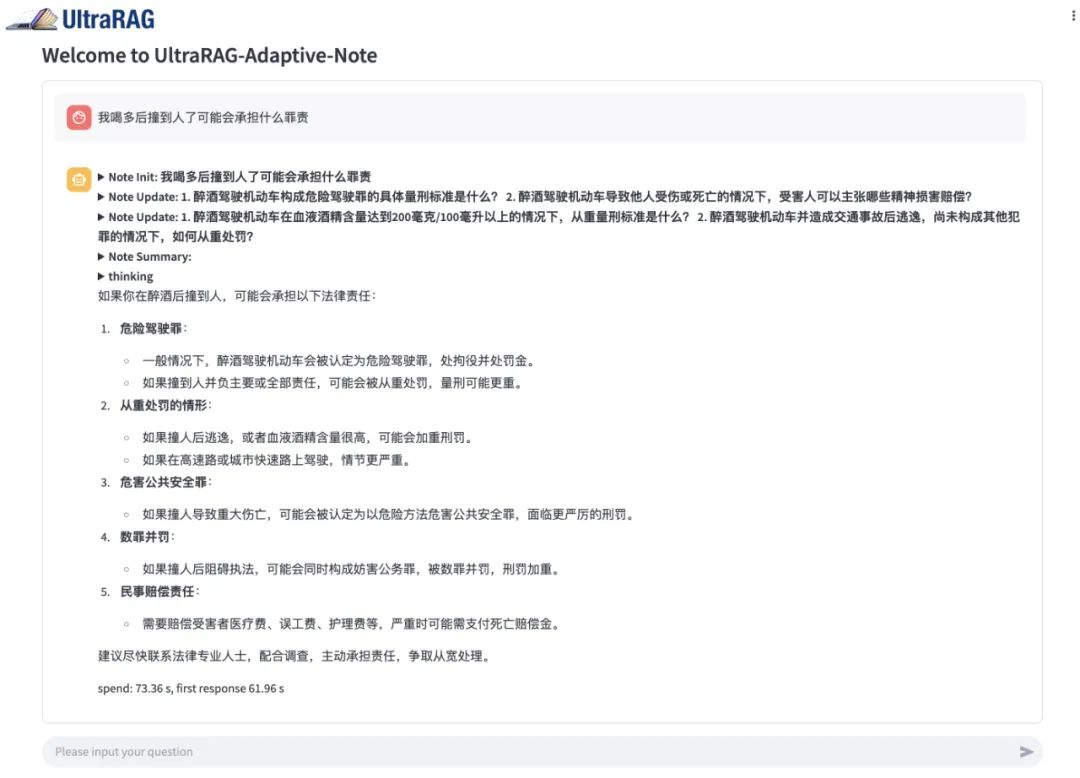
VanillaRAG:是最基础的 RAG(Retrieval-Augmented Generation,检索增强生成)架构,通常指的是未经优化或改进的标准 RAG 方法。它的基本流程包括:查询构造(Query Formation)、检索(Retrieval)、生成(Generation) Adaptive-Note: 一种用于复杂问答任务的自适应笔记增强 RAG 方法,采用 检索-记忆(Retriever-and-Memory) 机制, iteratively 收集和优化知识结构。它通过自适应记忆复审和任务导向生成提高知识交互质量,并采用基于笔记的探索终止策略确保信息充分获取,以提升答案质量。论文: https://arxiv.org/abs/2410.08821
硬件环境准备

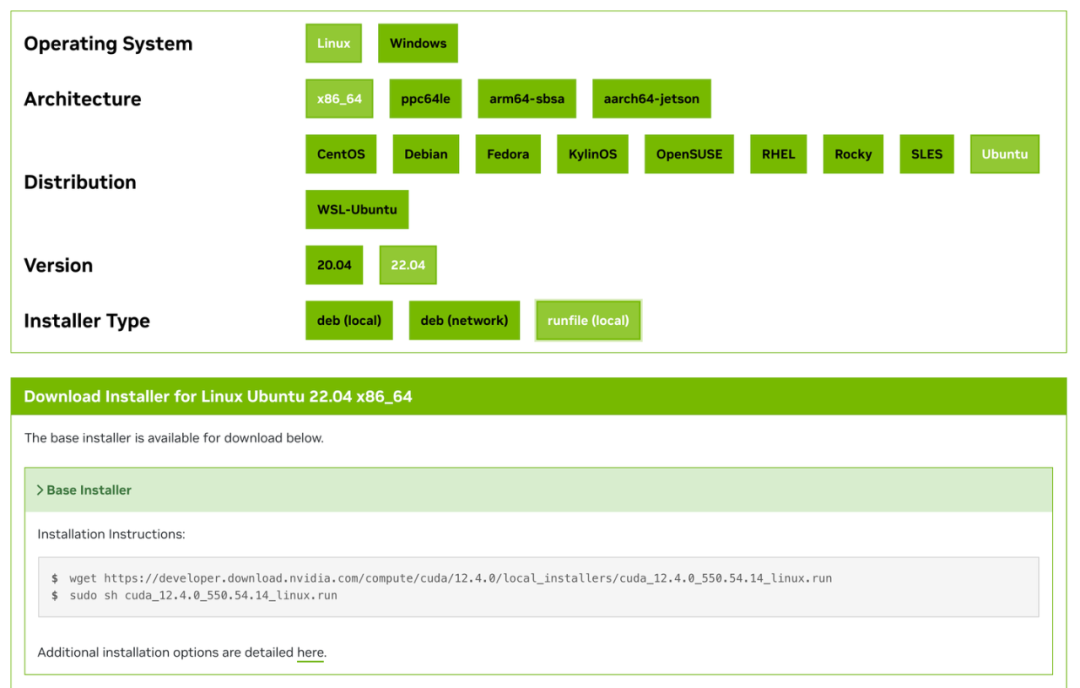 cuda-toolkit参数配置页面
UltraRAG配置
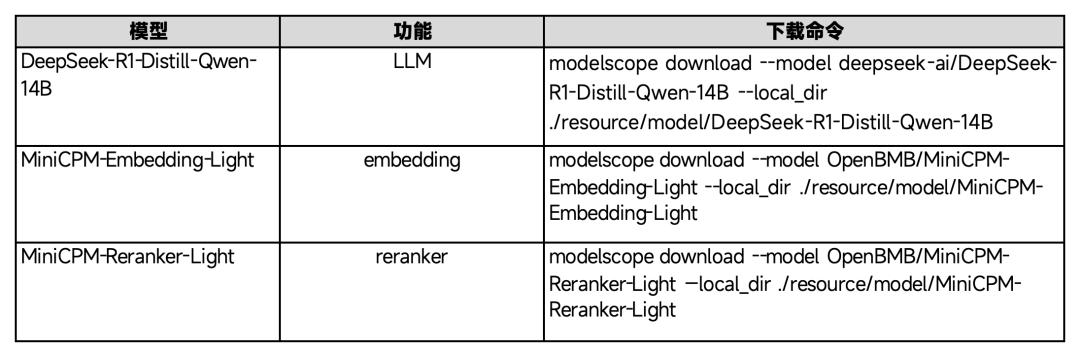
好了,现在你已经拥有了一个稳定的运行环境,可以配置 UltraRAG 了。接下来从 GitHub 仓库中下载 UltraRAG 并放到合适的位置,https://github.com/OpenBMB/UltraRAG (点个 star 支持一下吧 )。
)。
 )。
)。docker-compose up --build -d

#创建conda环境conda create -n ultrarag python=3.10#激活conda环境conda activate ultrarag安装相关依赖pip install -r requirements.txt -i https://pypi.tuna.tsinghua.edu.cn/simple
vllm serve DeepSeek-R1-Distill-Qwen-14B --gpu-memory-utilization 0.8 --dtype auto --api-key token-abc123

nohup vllm serve DeepSeek-R1-Distill-Qwen-14B --gpu-memory-utilization 0.8 --dtype auto --api-key token-abc123 &
streamlit run ultrarag/webui/webui.py --server.fileWatcherType none

和DeepSeek-R1对话 和
这里附上超详细视频教程,可以对照细节一步步上手:
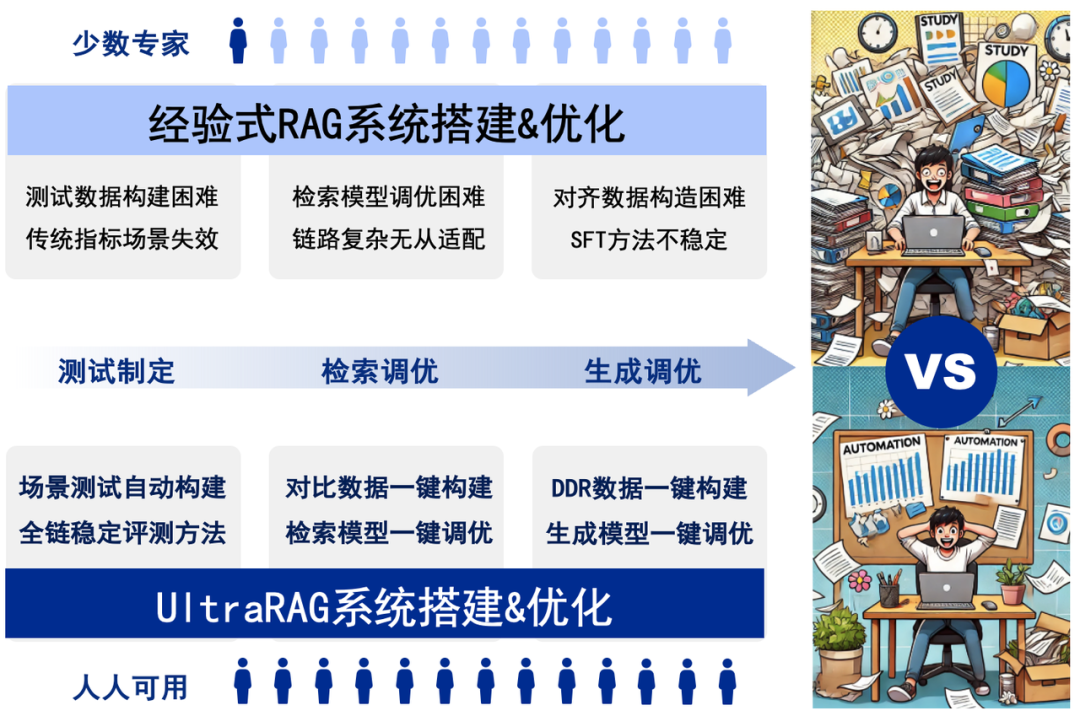
什么是 UltraRAG?
以上全部功能,都可以直接通过 web 前端快速实现。
